Window Frames Box Tutorial.
 | |
| (click on photo to enlarge) |
A Cauldron for Halloween.
 | |
| (click on photo to enlarge) |
 |
| (click on photo to enlarge) |
You need a piece of cardstock 20cm x 15cm the same colour as your window frames framelits.
Score and cut as shown. In portrait position. Score at 3cm and 12cm. In landscape position score at 8.5cm and 11.5cm.
Cut on the score lines as indicated. Make up your box.
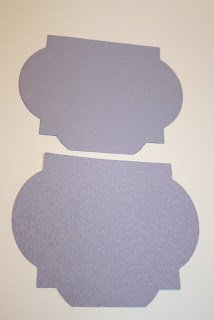
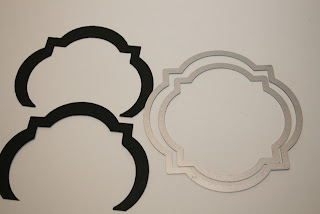
Cut two window frames framelits and trim them as shown.
You can emboss them too if you like. I used the new Lacey Brocade Embossing Folder in the mini page 6. I used the largest Window Frame and yes these are the same size believe it or not! Just a bad camera angle playing tricks with your eyes! hehe.
Stick these to the front and back of your box. I lined my box up with the right angles at the bottom of the box.
You can cut two pieces of cardstock out at the same time. Trim the ends down to suit. Mine are cut down to about 1.5cm below where the angles are on either side.
Now for a few extra details on my Cauldron.
The Handles on the Cauldron were made using the Labels Collection Framelits.
I made the little bat with the new Elegant Butterfly Punch on page 184 main catalogue.
The clouds of smoke are 1 3/4 inch scallop circle sponged with garden green and cut and half. And the flames are the birds wing from bird builder punch page 185 main catalogue.
I made the "Boo" with 2 x 1/2 inch circles and 4 circles from the Itty Bitty Punch Pack. Plus a small strip of black card just cut by hand.
Place the pumpkin pie small circles (or whatever colour you wish for your background colour) onto the 1/2 inch circles. Glue the strip just on the edge of the circles to make a capital "B". Glue googlie eyes onto your small black "oo".
I hope you have fun making your own Window Frames Framelit Boxes! (phew! Try saying that fast!)
If you have any questions or have liked this tutorial please leave a comment and let me know. I love hearing from you.


Thanks for the great tutorial Vicki, they're all very cute
ReplyDeleteBeautiful tutorial....
ReplyDeleteInstall Awning Servery Replacement Windows Hoppers Crossing