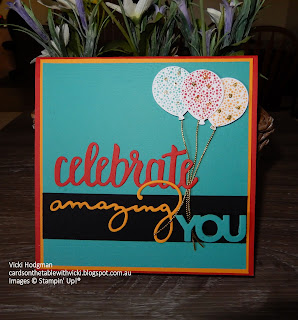
Instant Camera Pop Up Card Photo Tutorial.
Featuring: (Pop Up Card, 3D Card, Punch Art, Celebrate You Thinlets, Balloon Builder Punch, Stampin Up)
Hello Crafty Friends,
Today I have a very long post.
A photo Tutorial of how I made this special card.
I found photos on Pinterest for this idea but just made my own design and measurements.
Apologies for the terrible hand writing and some untidy work.
But there were a lot of steps I had to go through and hopefully you will get the idea. LOL.
So let's get started!
For the card base and card front I used:
Poppy Parade 14cm x 14cm
Mango Melody 13.5cm x 13.5cm
Bermuda Bay 13cm x 13cm
I decorated the front using the Celebrate You Thinlets and the Balloon Builder Punch.
The Pop Up Camera inside the card is made using two pieces of cardstock glued together.
A Black Piece which is attached to the card and a white piece glued to the front of the black cardstock to create a camera front.
Starting with the Black Piece.
21cm x 11cm
Score at 2.5cm, 11.5cm, 18 cm.
(the top of the camera will be the 2.5cm and the bottom of the camera is the 3cm piece)
I attached a Smoky Slate 1.5cm x 10cm piece to the bottom of the 3cm end as shown.
This is just to help remind which is the bottom of card and when punching/cutting out the slot I used the Smoky Slate card to help line up the Slot.
I cut half on the Smoky Slate and half on to the black as shown.
You can use the Classic Label Punch or (Retired Modern Label Punch).
Or the Label Thinlet from Lilypad Lake or any other thinlet frame you may have.
Allow enough room left at the edge for your white piece of cardstock to adhere 1cm over it.
This is how it will sit over the Smoky Slate end.
Now for the White Piece of Card to make the front of your camera.
11cm x 12cm
Score at 1cm, 7cm, 11cm
(the 1cm at each end of the this card will be the parts that are glued to the ends of your black piece.
Using your Stampin Write Markers draw three lines next to each other.
The lines are 4cm down from the top and 4.5cm in from the left side.
Make sure you are starting in the larger of the two main scored sections.
One section is 6cm and the other is 4cm.
This picture is a side view
The Punches used for the Camera are listed below. The Classic Label Punch (Modern Punch) is cut in half.
Sorry picture is on side view again. Whoops!
But this is how I placed them.
Stamp a greeting if you like on the 4cm piece.
Now we are going to put the camera together.
These two parts of the black piece are attached to the card as shown.
Make sure your grey section is at the bottom folded up...
Attach the one cm strip on your white piece to the bottom edge where your grey piece sits. It shouldn't cover the slot.
Then attach the top one cm piece to the top edge fold like shown below.
The two asterisks show the two pieces that will fold together when the card is closed so you get an idea on how it folds up inside the card.
Side view so you can see the folds and where it is attached to each other.
Finally the photo.
This card is pushed through the slot and is glued down only at the front edge to hold it in place.
11cm x 8 cm for the white base
7.5cm x 7.5cm black
for photo or greeting panel 7cm x 7cm
Add your photo/picture/greeting panel to the black piece and place into slot. Glue down at bottom edge close to edge of card as shown.
Here are a few suggestions for the photo panel.
A photocopied photo
A punch art picture
A greeting stamp, or even a gift card.
Phew!!!
That was extremely long and if you made it to the end...a round of applause for you...well done!
And thanks for taking the time.
Big Hugs...and catch you all next week
Vx
HI THERE,
In Australia? You can Shop with Me - Shop Button at top of page.


that is a good post with most lol way to make a card
ReplyDeleteFerns n Petals